Home>Create & Decorate>DIY & Crafts>Master Curved Piecing: A Comprehensive Guide
DIY & Crafts
Master Curved Piecing: A Comprehensive Guide
Published: February 15, 2024

Senior Editor in Create & Decorate, Kathryn combines traditional craftsmanship with contemporary trends. Her background in textile design and commitment to sustainable crafts inspire both content and community.
Discover the art of master curved piecing with our comprehensive guide. Perfect for DIY & Crafts enthusiasts looking to elevate their quilting skills.
(Many of the links in this article redirect to a specific reviewed product. Your purchase of these products through affiliate links helps to generate commission for Twigandthistle.com, at no extra cost. Learn more)
Introduction
Curved piecing is a captivating and versatile technique that adds a touch of artistry to quilting and sewing projects. The art of curved piecing involves sewing together pieces of fabric with gentle or dramatic curves, resulting in stunning designs that can elevate any quilt or craft project. Whether you're a seasoned quilter or a novice sewist, mastering curved piecing opens up a world of creative possibilities and allows you to take your crafting skills to new heights.
In this comprehensive guide, we will delve into the intricacies of curved piecing, providing you with the knowledge and confidence to tackle curved seam projects with ease. From understanding the fundamentals of curved piecing to exploring advanced techniques, this guide will equip you with the essential skills and insights needed to create beautifully curved designs that will impress and inspire.
Throughout this guide, we will explore the tools and materials essential for successful curved piecing, as well as the step-by-step process of preparing fabric, sewing curved seams, and achieving precise results through pressing and trimming. Additionally, we will address common mistakes that may arise during curved piecing and offer valuable tips on how to avoid them, ensuring a smooth and enjoyable crafting experience.
Moreover, we will delve into advanced techniques that will enable you to expand your repertoire and experiment with intricate curved designs, pushing the boundaries of your creativity. Whether you aspire to create stunning curved pieced quilts, garments, or home decor items, this guide will empower you to bring your vision to life with finesse and precision.
By the end of this journey through the art of curved piecing, you will have gained a deep understanding of this captivating technique and be well-equipped to embark on your own curved piecing projects. So, let's embark on this enriching exploration of curved piecing and unlock the boundless potential for creativity and expression that it offers.
Read more: How To Build A Curved Deck
Understanding Curved Piecing
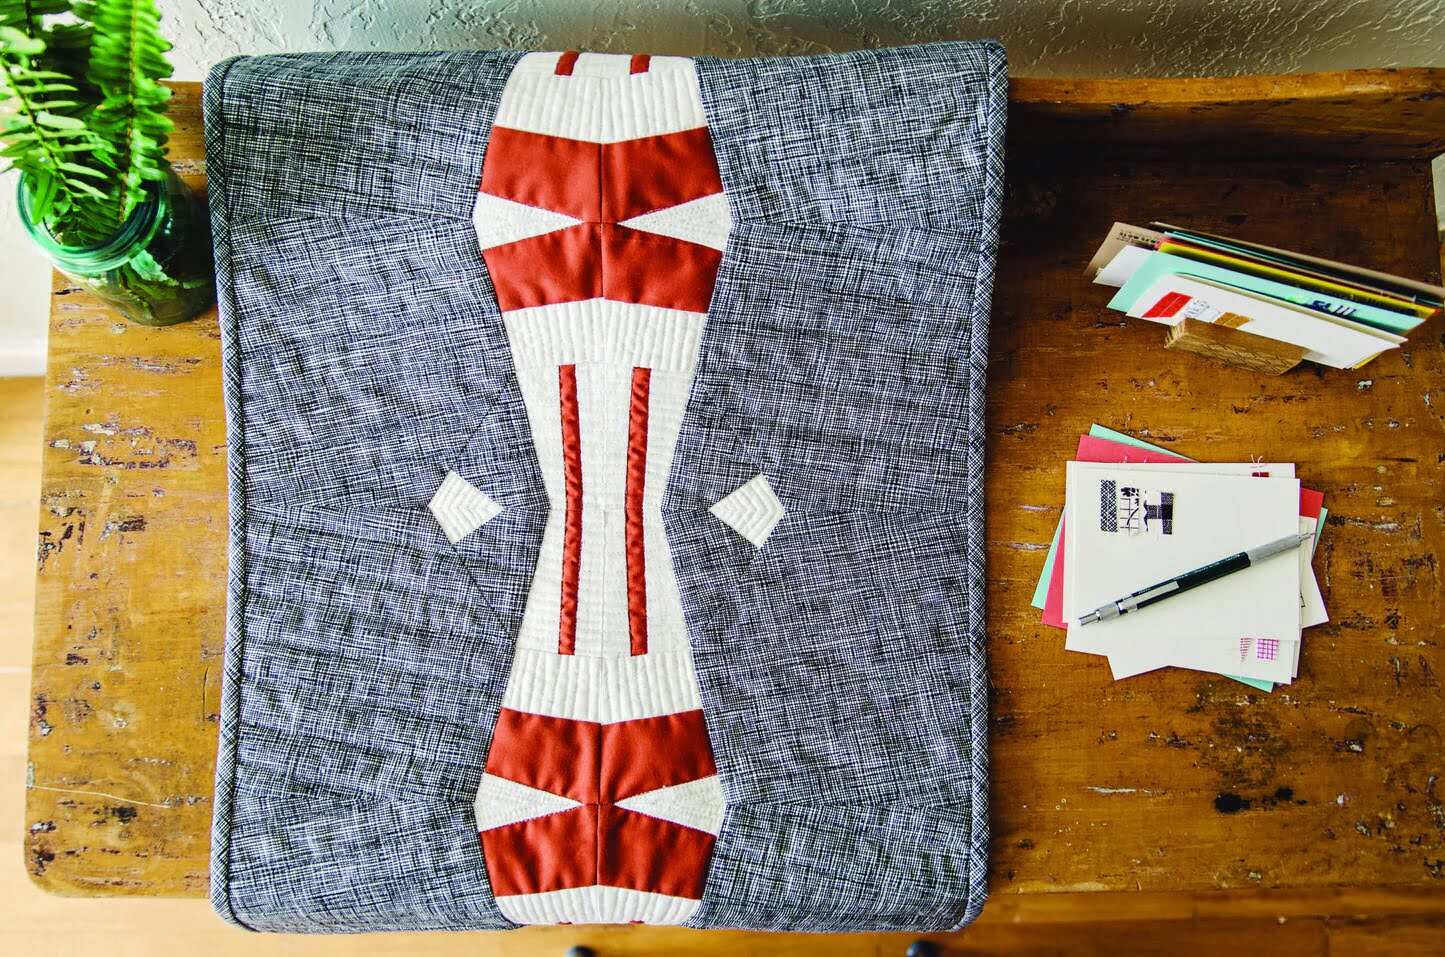
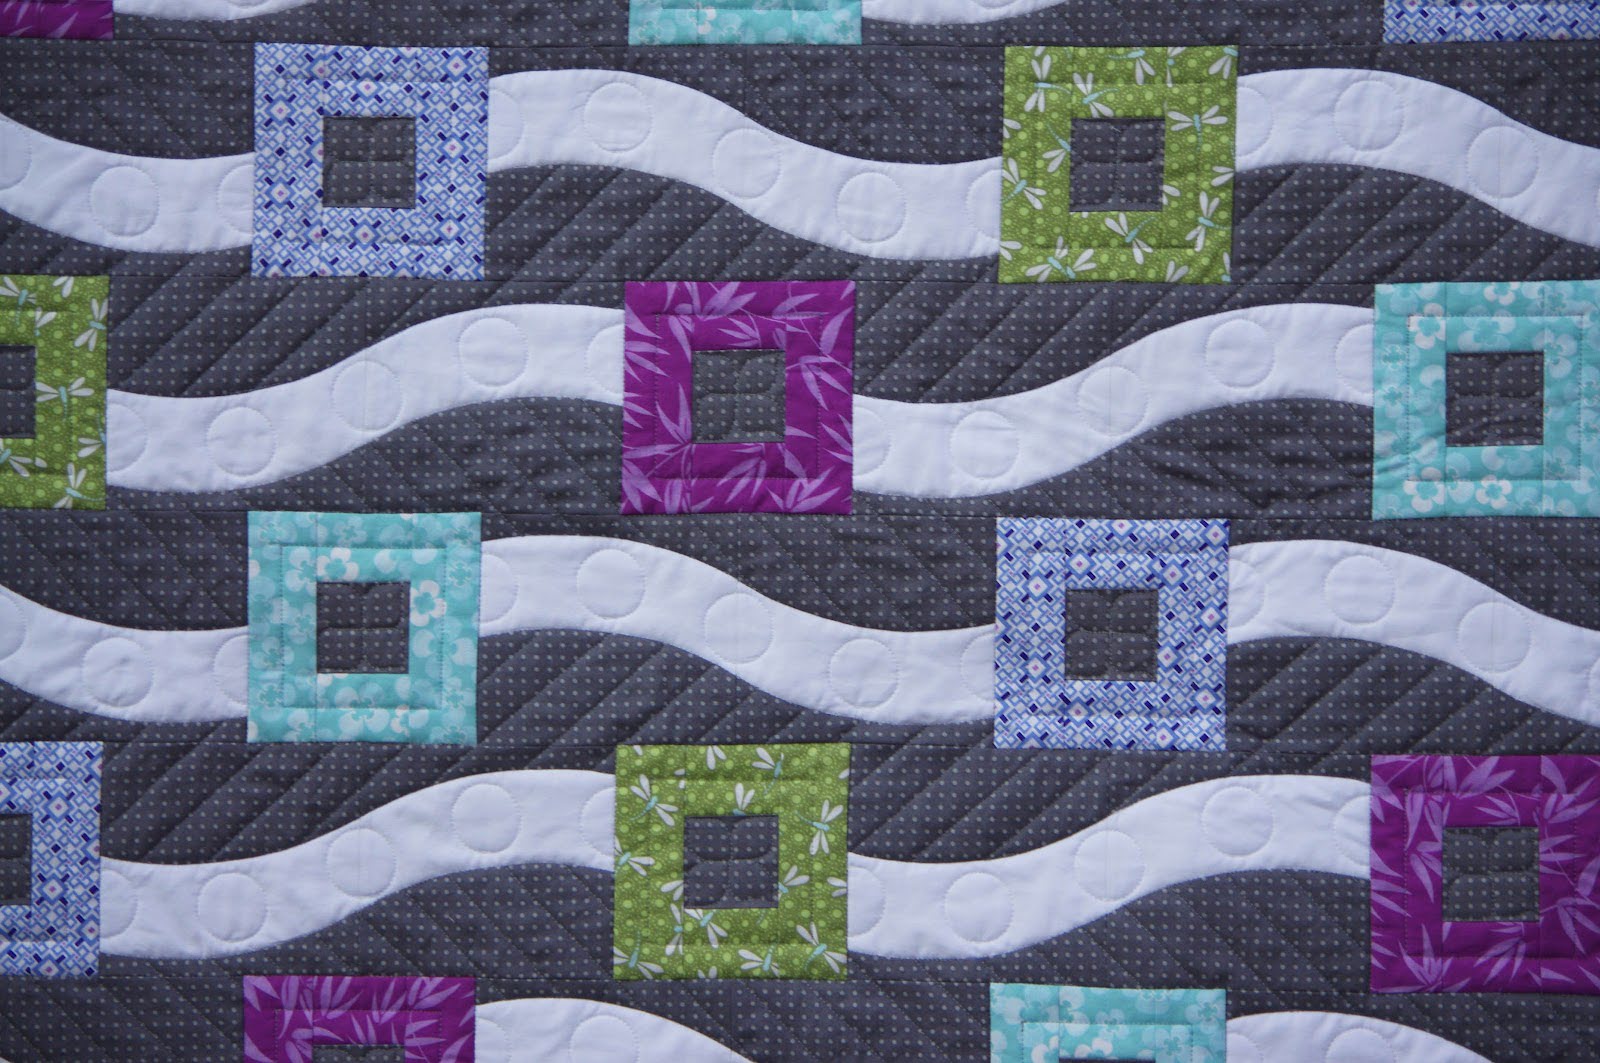
Curved piecing is a technique that involves sewing together pieces of fabric with gentle or dramatic curves, creating visually captivating designs. Unlike traditional straight seams, curved piecing adds fluidity and movement to quilt blocks and other sewing projects. This technique opens up a world of creative possibilities, allowing crafters to experiment with unique shapes and intricate patterns.
Curved piecing can be achieved through various methods, including using templates, improvisational cutting, or specialty rulers designed for creating smooth, precise curves. Whether you're working on a classic Drunkard's Path block, a modern Double Wedding Ring quilt, or a contemporary art quilt, understanding the principles of curved piecing is essential for achieving professional-looking results.
One of the key aspects of understanding curved piecing is mastering the art of easing fabric around curves. This involves strategically aligning and stitching together convex and concave curves to ensure that the fabric lays flat and the seams match seamlessly. While curved piecing may seem daunting at first, with practice and patience, crafters can develop the skills and confidence needed to tackle curved seam projects with ease.
Furthermore, understanding the impact of fabric grain and bias on curved piecing is crucial for achieving precise and consistent results. Fabric grain refers to the direction of the threads in the woven fabric, while the bias is the diagonal direction across the grain. When working with curved piecing, being mindful of how fabric behaves along the bias and grain can influence the ease of sewing curves and the overall stability of the finished piece.
In addition to traditional quilting, curved piecing techniques can be applied to a wide range of sewing projects, including garments, accessories, and home decor items. By mastering curved piecing, crafters can add a touch of elegance and sophistication to their creations, elevating their sewing skills to new heights.
Understanding the fundamentals of curved piecing sets the stage for a fulfilling and enriching journey into the world of quilting and sewing. With a solid grasp of the principles and techniques involved, crafters can confidently embark on curved piecing projects, unleashing their creativity and bringing their artistic visions to life with finesse and precision.
Tools and Materials
When venturing into the captivating realm of curved piecing, having the right tools and materials at your disposal is essential for achieving professional results and a seamless crafting experience. Here's a comprehensive overview of the key items you'll need to embark on your curved piecing journey:
Sewing Machine:
A reliable sewing machine equipped with a straight stitch and the ability to adjust stitch length is fundamental for curved piecing. While curved piecing can be done by hand, a sewing machine expedites the process and ensures precise stitching, making it the preferred choice for many crafters.
Rotary Cutter and Cutting Mat:
A rotary cutter paired with a self-healing cutting mat is indispensable for accurately cutting fabric pieces, including gentle curves and intricate shapes. Opt for a rotary cutter with a comfortable grip and a sharp blade to effortlessly navigate through layers of fabric.
Read more: Wood Window Building: A DIY Guide
Specialty Curved Piecing Rulers or Templates:
Curved piecing rulers or templates designed specifically for creating smooth, precise curves are invaluable tools for achieving intricate designs with ease. These specialized tools come in various shapes and sizes, allowing crafters to experiment with a wide range of curved patterns and motifs.
Fabric Selection:
Choosing high-quality quilting cotton or fabric with a tight weave is crucial for curved piecing projects. Opt for fabrics that complement each other harmoniously and provide sufficient contrast to highlight the curves in your designs. Additionally, consider prewashing and pressing your fabric to minimize shrinkage and ensure a smooth sewing process.
Pins or Wonder Clips:
Pins or wonder clips are essential for securing fabric layers together when sewing curved seams. Look for fine, sharp pins that glide easily through fabric, or opt for wonder clips that securely hold fabric layers in place without causing distortion.
Seam Roller or Mini Iron:
A seam roller or mini iron is a handy tool for pressing seams open or to one side when working on curved piecing projects. These compact tools allow for precise pressing without stretching or distorting the fabric, ensuring crisp and polished results.
Read more: Stone Patios: A DIY Guide
Thread and Needles:
High-quality thread in a coordinating color and sharp, fine needles are essential for achieving neat and secure curved seams. Opt for thread specifically designed for quilting or sewing projects, and select needles that smoothly penetrate fabric layers without causing puckering or snags.
Marking Tools:
Fabric marking pencils, chalk, or water-soluble pens are indispensable for transferring pattern markings and guidelines onto fabric pieces. These tools aid in accurately aligning and sewing curved seams, ensuring precision and consistency throughout the piecing process.
By equipping yourself with these essential tools and materials, you'll be well-prepared to embark on your curved piecing endeavors with confidence and creativity. With the right resources at your fingertips, you can delve into the art of curved piecing and bring your imaginative designs to life with finesse and precision.
Preparing Fabric for Curved Piecing
Before diving into the intricate art of curved piecing, it's essential to prepare your fabric thoughtfully to ensure smooth and precise seam construction. Properly preparing the fabric sets the foundation for successful curved piecing projects and contributes to the overall quality of the finished piece. Here's a detailed overview of the steps involved in preparing fabric for curved piecing:
1. Fabric Selection:
Carefully select high-quality quilting cotton or fabric with a tight weave for your curved piecing projects. Opt for fabrics that complement each other harmoniously and provide sufficient contrast to accentuate the curves in your designs. Additionally, consider prewashing and pressing your fabric to minimize shrinkage and remove any residual sizing or impurities that may affect the fabric's behavior during piecing.
Read more: Sloped Shed Foundation: A DIY Guide
2. Cutting Fabric Pieces:
Using a rotary cutter and a self-healing cutting mat, accurately cut the fabric pieces required for your curved piecing project. Pay close attention to the grain and bias of the fabric when cutting curved shapes, as aligning the pieces along the appropriate grain or bias can significantly impact the ease of sewing curves and the overall stability of the finished piece.
3. Marking Guidelines:
Utilize fabric marking pencils, chalk, or water-soluble pens to transfer pattern markings and guidelines onto the fabric pieces. Marking the seam lines and matching points on the fabric will aid in accurately aligning and sewing curved seams, ensuring precision and consistency throughout the piecing process.
4. Organizing Fabric Pieces:
Organize and arrange the fabric pieces according to the piecing layout, taking care to match and pair the curved edges as per the pattern or design. This step is crucial for visualizing the final layout of the curved piecing project and ensuring that the fabric pieces are ready for seamless assembly.
By meticulously preparing your fabric through these steps, you'll lay the groundwork for a successful curved piecing endeavor. Thoughtful fabric preparation contributes to the overall precision and visual impact of curved piecing projects, setting the stage for a seamless and enjoyable piecing process. With your fabric meticulously prepared, you're now ready to embark on the next phase of the curved piecing journey, confidently navigating through the artistry and intricacies of sewing curved seams.
Sewing Curved Seams
Sewing curved seams is a pivotal stage in the art of curved piecing, requiring precision, patience, and a strategic approach to achieve seamless and visually striking results. Whether you're working on a classic Drunkard's Path block, a modern Double Wedding Ring quilt, or a contemporary art quilt, mastering the technique of sewing curved seams is essential for bringing your creative vision to life with finesse and accuracy.
To begin sewing curved seams, it's crucial to align the curved edges of the fabric pieces meticulously. Whether using pins or wonder clips, securing the fabric layers together at key points along the curve is essential for maintaining alignment and preventing shifting during the sewing process. This step sets the foundation for smooth and controlled stitching along the curved seam.
When guiding the fabric through the sewing machine, maintain a steady pace and gently ease the fabric around the curve, allowing the machine to feed the fabric evenly. It's important to avoid pulling or stretching the fabric, as this can distort the curve and lead to puckering or misalignment of the seams. Instead, focus on guiding the fabric with a light touch, allowing the machine to smoothly stitch along the curve.
Adjusting the stitch length on your sewing machine can also contribute to the success of sewing curved seams. Opting for a slightly shorter stitch length can enhance the control and precision of the stitching, particularly around tight or intricate curves. Experiment with different stitch lengths to find the setting that best suits the specific curves and fabric types you're working with.
As you approach the end of the curved seam, maintain a consistent seam allowance and ensure that the fabric layers remain aligned. Securing the seam with backstitching or a secure knot at the end reinforces the integrity of the seam and prevents unraveling, providing a durable and professional finish to your curved piecing project.
By mastering the art of sewing curved seams, crafters can elevate their quilting and sewing projects with graceful and fluid designs, adding a touch of artistry and sophistication to their creations. With practice and attention to detail, sewing curved seams becomes a rewarding and enjoyable aspect of curved piecing, allowing crafters to bring their imaginative designs to life with precision and finesse.
Read more: Pallet Shed Building: A DIY Guide
Pressing and Trimming
Once the curved seams are skillfully stitched, the next crucial steps in the curved piecing process involve pressing and trimming the fabric to refine the seam allowances and ensure a polished and professional finish. Proper pressing and trimming techniques contribute to the overall precision and visual impact of curved piecing projects, enhancing the clarity of the curves and the cohesion of the pieced elements.
Pressing Curved Seams
Gentle and strategic pressing is essential for coaxing the curved seams into place and achieving a smooth and flat appearance. Begin by setting the seam with an iron to meld the stitches and relax the fabric. This initial step helps the seam to hold its shape and reduces the likelihood of distortion during pressing.
When pressing curved seams, consider using a tailor's clapper or a wooden pressing tool to gently press the seam allowances open or to one side. These tools aid in distributing the heat and steam evenly, resulting in crisp and well-defined curved seams. Additionally, utilizing a seam roll or a mini iron allows for precise pressing along the curves, ensuring that the fabric lays flat without stretching or distorting the seam.
Trimming Seam Allowances
After pressing the curved seams, carefully trim the seam allowances to reduce bulk and create a smooth and even surface. Using sharp fabric scissors or rotary cutters, trim the excess fabric close to the seam, taking care not to cut into the stitched line. This meticulous trimming process refines the curves and enhances the overall accuracy and visual appeal of the pieced elements.
When trimming seam allowances, maintain a steady hand and follow the natural curve of the seam to achieve clean and graceful lines. Pay attention to any concave or convex curves, adjusting the trimming technique to accommodate the specific shape of the seam. By meticulously trimming the seam allowances, crafters can achieve a refined and professional finish, setting the stage for the assembly and display of the curved piecing project.
By embracing thoughtful pressing and trimming techniques, crafters can elevate their curved piecing projects with precision and finesse, bringing out the inherent beauty of the curved designs and creating visually captivating and polished creations. These essential steps in the curved piecing process contribute to the overall quality and impact of the finished piece, showcasing the artistry and skill of the crafter in every meticulously pressed curve and carefully trimmed seam allowance.
Common Mistakes and How to Avoid Them
Mastering curved piecing requires attention to detail and a keen understanding of potential pitfalls that may arise during the piecing process. By being aware of common mistakes and implementing proactive strategies to avoid them, crafters can elevate their curved piecing projects with precision and finesse. Here are some common mistakes encountered in curved piecing and valuable tips on how to circumvent them:
Read more: Crafting A Home Grown Journal: A DIY Guide
1. Misaligned Seams:
Misaligning curved seams can disrupt the flow and visual impact of the design, leading to inconsistencies and a disjointed appearance. To avoid this, meticulously mark matching points on the fabric pieces and use pins or wonder clips to secure the layers together before sewing. Taking the time to align the fabric accurately at key points along the curve is essential for maintaining the integrity of the design.
2. Fabric Stretching:
Stretching the fabric while sewing curved seams can distort the curves and result in puckered or uneven stitching. To prevent fabric stretching, handle the fabric with a light touch and avoid pulling or tugging it through the sewing machine. Additionally, consider using a slightly shorter stitch length to enhance control and minimize the risk of fabric distortion.
3. Inadequate Pressing:
Inadequate pressing of curved seams can diminish the clarity of the curves and compromise the overall appearance of the pieced elements. Ensure thorough and strategic pressing by using tailor's clappers, wooden pressing tools, or seam rollers to coax the fabric into place and achieve crisp, well-defined curved seams. Thoughtful pressing contributes to the professional finish of curved piecing projects.
4. Insufficient Trimming:
Neglecting to trim seam allowances adequately can result in bulky and uneven surfaces, detracting from the precision and visual appeal of the curved piecing. Take the time to carefully trim the seam allowances close to the stitched line, following the natural curve of the seam to create smooth and graceful lines. Meticulous trimming refines the curves and enhances the overall accuracy of the pieced elements.
By being mindful of these common mistakes and implementing proactive measures to address them, crafters can navigate the art of curved piecing with confidence and finesse, ensuring that their projects showcase the beauty and artistry of meticulously executed curved designs. With a keen eye for detail and a commitment to precision, curved piecing projects can flourish with grace and sophistication, captivating viewers with their seamless and visually captivating curves.
Read more: Concrete Slab Shed Building: A DIY Guide
Advanced Techniques
In the realm of curved piecing, mastering advanced techniques opens up a world of boundless creativity and allows crafters to push the boundaries of traditional quilting and sewing. These advanced techniques empower crafters to experiment with intricate designs, explore unconventional piecing methods, and infuse their projects with a heightened level of artistry and sophistication.
1. Improvisational Curved Piecing:
Embracing improvisational curved piecing liberates crafters from rigid patterns and templates, allowing for free-form exploration of curves and shapes. This technique encourages intuitive piecing, where fabric pieces are cut and sewn together organically, resulting in dynamic and visually captivating designs. By relinquishing strict guidelines and embracing spontaneity, crafters can unleash their creativity and produce one-of-a-kind curved piecing projects that exude artistic flair.
2. Complex Curve Combinations:
Exploring complex curve combinations involves integrating multiple curve types within a single design, such as concave, convex, and S-curves. By skillfully combining these curve variations, crafters can create mesmerizing and intricate patterns that showcase the interplay of curves in a harmonious and visually striking manner. This advanced technique challenges crafters to refine their curve-matching skills and experiment with unconventional curve pairings, resulting in captivating and multidimensional curved piecing projects.
3. Dimensional Curved Piecing:
Venturing into dimensional curved piecing introduces a sculptural element to quilting and sewing projects, elevating the designs from flat surfaces to dynamic, three-dimensional creations. Crafters can explore techniques such as fabric manipulation, tucks, and pleats to add depth and texture to curved piecing projects, resulting in visually engaging and tactile designs that transcend traditional quilting norms. Dimensional curved piecing invites crafters to think beyond the flat plane, infusing their projects with depth and visual intrigue.
4. Curved Piecing with Specialty Fabrics:
Incorporating specialty fabrics, such as silk, velvet, or textured materials, into curved piecing projects adds a luxurious and opulent dimension to the designs. Working with these unique fabrics presents challenges and opportunities, as crafters navigate the nuances of handling and sewing non-traditional materials. By integrating specialty fabrics into curved piecing, crafters can create sumptuous and visually stunning projects that exude elegance and sophistication, expanding the possibilities of curved piecing beyond conventional quilting cotton.
5. Artistic Embellishments and Surface Design:
Elevating curved piecing projects with artistic embellishments and surface design techniques allows crafters to infuse their creations with personalized touches and intricate detailing. Techniques such as hand embroidery, appliqué, beading, and fabric painting can be integrated into curved piecing projects, adding a layer of artistry and individuality to the designs. By incorporating these artistic elements, crafters can imbue their curved piecing projects with narrative, symbolism, and visual richness, transforming them into expressive works of art.
By delving into these advanced techniques, crafters can expand their repertoire, challenge their creative boundaries, and infuse their curved piecing projects with a heightened level of artistry and sophistication. These advanced techniques open doors to limitless possibilities, allowing crafters to express their unique artistic vision and create curved piecing projects that captivate and inspire viewers with their ingenuity and creativity.
Finishing and Displaying Curved Pieced Quilts
After investing time, skill, and creativity into crafting a stunning curved pieced quilt, the final steps of finishing and displaying are essential for showcasing the artistry and craftsmanship embodied in the project. The finishing touches not only enhance the overall appearance of the quilt but also ensure its longevity and visual impact. Here's a detailed exploration of the key aspects involved in finishing and displaying curved pieced quilts:
Binding and Edging
Applying a meticulously crafted binding to the edges of the quilt not only provides a polished and professional finish but also secures the layers of the quilt, contributing to its durability. Crafters can choose from a variety of binding techniques, such as double-fold binding or bias tape, to complement the design and colors of the quilt. Thoughtful selection of the binding fabric adds a harmonious border that frames the curved pieced elements, enhancing the visual cohesiveness of the quilt.
Read more: Stone Shed Building: A DIY Guide
Quilting and Embellishments
Quilting the layers of the curved pieced quilt not only adds texture and dimension but also reinforces the structural integrity of the project. Crafters can explore quilting patterns that accentuate the curves and motifs within the quilt, enhancing the visual impact and tactile appeal. Additionally, incorporating artistic embellishments, such as hand embroidery, appliqué, or beadwork, infuses the quilt with personalized touches and intricate detailing, elevating it from a functional piece to a work of art.
Display and Presentation
Choosing the ideal method for displaying the curved pieced quilt is crucial for highlighting its beauty and craftsmanship. Whether opting for a traditional hanging sleeve for wall display, a decorative quilt stand for tabletop presentation, or incorporating the quilt into home decor as a throw or bedspread, thoughtful consideration of the display method ensures that the quilt is showcased in a manner that accentuates its unique design and artistic merit.
Preservation and Care
Implementing proper preservation and care practices is essential for safeguarding the longevity and pristine condition of the curved pieced quilt. Crafters can consider storing the quilt in a protective cover or display case to shield it from dust and light exposure. Additionally, periodic airing and gentle spot cleaning, if necessary, contribute to the preservation of the quilt's beauty and integrity, ensuring that it remains a cherished heirloom for generations to come.
By attending to these crucial aspects of finishing and displaying curved pieced quilts, crafters can elevate their creations from mere fabric assemblies to captivating works of art that command attention and admiration. Thoughtful consideration of binding, quilting, display, and preservation ensures that the artistry and skill embodied in the curved pieced quilt are celebrated and preserved, allowing the project to shine as a testament to the craftsperson's dedication and creativity.
Conclusion
In conclusion, mastering the art of curved piecing opens a gateway to a world of creativity, precision, and artistic expression in quilting and sewing. Throughout this comprehensive guide, we have delved into the intricacies of curved piecing, from understanding the fundamentals to exploring advanced techniques, equipping crafters with the knowledge and confidence to embark on their own curved piecing projects.
Curved piecing, with its gentle or dramatic curves, adds fluidity and movement to quilt blocks and other sewing projects, elevating them to new levels of visual appeal. By understanding the principles of curved piecing, including fabric grain and bias, crafters can achieve precise and consistent results, bringing their imaginative designs to life with finesse and accuracy.
The essential tools and materials required for successful curved piecing, such as specialty rulers, high-quality fabric, and precise cutting tools, set the stage for a seamless and enjoyable piecing experience. Thoughtful fabric preparation, meticulous sewing of curved seams, and strategic pressing and trimming techniques contribute to the overall precision and visual impact of curved piecing projects.
Moreover, by being aware of common mistakes and implementing proactive strategies to avoid them, crafters can navigate the art of curved piecing with confidence and finesse, ensuring that their projects showcase the beauty and artistry of meticulously executed curved designs.
The exploration of advanced techniques, such as improvisational curved piecing, complex curve combinations, and dimensional piecing, empowers crafters to push the boundaries of traditional quilting and sewing, infusing their projects with a heightened level of artistry and sophistication.
Finally, the finishing and displaying of curved pieced quilts, including binding, quilting, and thoughtful presentation, ensure that the artistry and craftsmanship embodied in the project are celebrated and preserved, allowing the quilt to shine as a testament to the craftsperson's dedication and creativity.
In essence, curved piecing is not merely a technique; it is an art form that invites crafters to explore, innovate, and create with precision and finesse. By mastering curved piecing, crafters can bring their imaginative designs to life, captivating viewers with visually captivating and polished creations that showcase the beauty of meticulously executed curved designs.